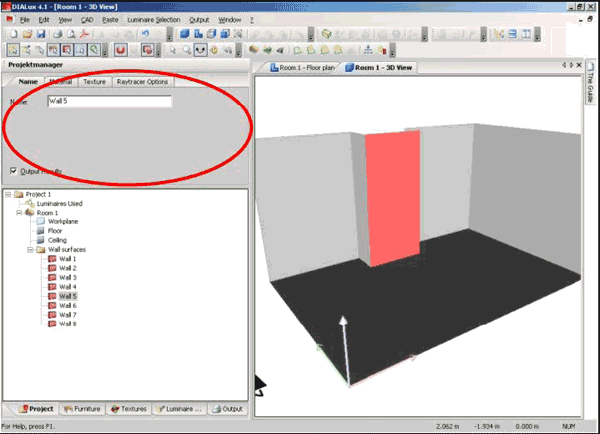
Select a wall in the 3D view, so that it is indicated in red. Alternatively in the Project manager you can select the corresponding wall and then similarly it is indicated in red. As soon as you marked an object, the properties of the wall selected will appear in the Inspector. Here you can change the name of the wall and you can display the output results. If a shadow is displayed after the calculation, e.g. in the 3D rendering, you must define the calculation grid in the outputs. A better display will result from a smaller calculation grid (by increasing the number of points). Naturally the consequence of a smaller calculation grid is an increase in the calculation time for your computer.
Fig. 100 Properties of a wall – Name
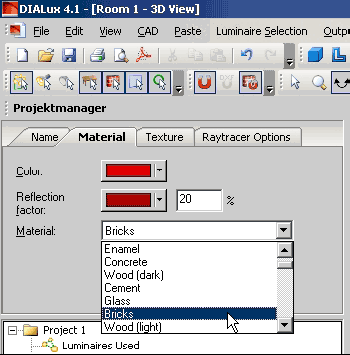
On the second tab –Material– you adjust the material properties for the wall. The reflectance value changes in response to new material choice. You can specify an alternative reflectance directly in the reflectance box.
Fig. 101 Properties of a wall – Material
In the Texture tab you can adapt the texture properties, if you have placed a texture on the wall. In the Raytracer Options tab you can adjust the properties, which the wall should have if you have started the Raytracer provided by DIALux.